Wednesday, June 29, 2011

I'm busy...

I'm still here...I promise!
I've just been working on something I started oh, I'd say, 2 YEARS ago! 
My husband is SUPER excited that I'm finishing it so that he doesn't have to look at the 3 garbage bags full of old jeans and old fabric that had taken up residence in the garage.

I had my friend Amy over for a little bit last night and she TOTALLY helped me with the plan of attack.  That's always the biggest issue for me.  So with her help, I'm well on my way to finishing my sewing project that I've been putting off soooooo long.

HOPEFULLY I'll finish tonight or tomorrow!  Stay tuned!

Flylady is one of my all-time heroes!  According to her system, Wednesday is Anti-Procrastination Day.  

How appropriate! 

Lots o' Love!

Megan

Tuesday, June 21, 2011

I {heart} San Diego!

Happy First Day of Summer!

I've been having such a wonderful week.  My sister and her family is in town and we decided to spend time exploring my hometown and I have to say, I'm falling back in love with San Diego.  I've never not loved living here...I'm just in TOTAL head over heels LOVE again!  

Saturday we went to Seaport Village.  
Seaport Village
It's a lovely little seaside market with tons of charm!  

Seaport Village
We took a picnic lunch and flew kites, then walked around and looked at little shops.
Seaport Village
We let the kids ride the historic carousel that was hand-carved in 1895.
Then as we were leaving there was a street performer who attracted the kids...they were mesmerized! 

Last night we drove over the Coronado Bay Bridge and had a picnic dinner on the beach of Coronado Island.
We were right next to the Hotel del Coronado, where the movie, Some Like It Hot, with Marilyn Monroe, was filmed.

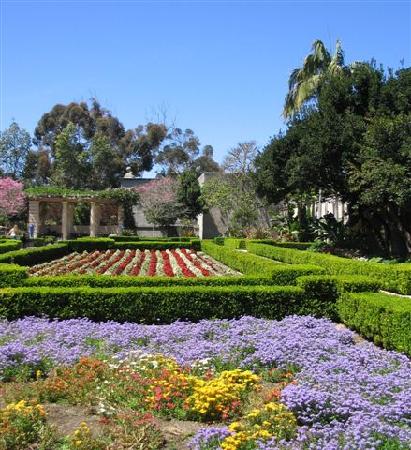
I 'm having a WONDERFUL day today!  We went to Balboa Park this morning.  Seriously one of the coolest things in San Diego!  Balboa Park was built for the 1915 World Fair. There is some AMAZING architecture, beautiful gardens, awesome museums, and so much more.  If you're ever in the area, it's a MUST SEE!

 
This is the bell tower which sounds so cool every hour.
There are really cool, old buildings.
the koi pond
Cool archways which make a lovely backdrop for photos.
museums
boxwood hedged gardens
the museum of man
Mercury in the Timken Museum

We're going to bbq at the park tonight to finish off our day.

REALLY!!! I live here!!!???  
I'm so grateful to live in such a beautiful place!

What do you like to do in your neighborhood?  
How are you choosing to enjoy Summer?

Lots o' love,

Megan

Monday, June 20, 2011

Burgers and Fries?

For Father's Day I decided to give a gift of sweetness...
in the form of dessert!

YES, THAT'S DESSERT!  
The bun is a cupcake, the burger is a brownie, 
and the fries are sugar cookies!

You can go to bakerella and she'll show you how it's done.
She even has a link for the box, paper liner, 
and fry bag so you can print them!

So stinkin' cute!

I hope everyone had a good Father's Day!

Lots o' love,

Megan

Saturday, June 18, 2011

Thrifted Finds - Mirror with Awesome Frame

For some reason the files for the before and after picture aren't loading...LAME!  But you'll still get the gist.

Here is a sweet plastic $2 mirror I got at the thrift store, but you can't tell it's plastic until you touch it.
 I wasn't so fond of the gold. The backing wouldn't come apart, so I had to just cover the mirror. 
 I taped to pieces of scrap paper together so it covered the whole mirror with a little overlap. I laid it inside the frame and made a crease at the edge of the frame.
 I cut it out, maybe 1/4" or less, past the crease.
 Then I slid the paper under the frame and made sure every part of the mirror was covered.
 Like so...
 Then I painted it in Krylon Watermelon.  
 And I pretty much love it!
This is perfect for my little girl's room and it'll be perfect for the shower I'm hosting!

Lots o' love,

Megan

Friday, June 17, 2011

Faux Porcelain Birds

My daughter's room has a bird theme.  I made a quilt to mimic one from pottery barn kids, that I'll show you another time, and I painted 3 little canvases for wall, all with a bird theme.  I've been wanting to find fat little birds for a long time to accessorize but haven't had any luck.  Yesterday at dollar tree, what did I happen to see but fat little birds!  Yes they are ugly but not so bad that my favorite spray paint won't help!
 My spray painting technique is that I plant myself in the grass and just turn the cardboard they are on so I'm down low enough to get every side,.
 After one full rotation.
 I think I ended up giving them about 3-4 coats of spray paint to get the look I wanted. 
 It was a little tricky getting into all the little nooks and crannies, but I love how they turned out.
The best part is that they look like porcelain! 
(I'm also planning a baby shower in a few months and these will be PERFECT!!!)

Wednesday, June 15, 2011

Sick of red

I haven't posted for a few days because Friday was the last day of school and I've been enjoying spending time with all my little ones.

I had a bunch of other projects that I needed to post, but I developed an itchy spray paint finger and decided to paint my front door!

Here is what my front door looked like Monday morning...
 Brick red, and pretty blah with a few scratches mixed in.
I was tired of the red, especially since when the door is open...it only matches with my decor at Christmastime. Time for a MAKEOVER! I taped it all off then tried to take it off the hinges...couldn't.  So I decided I could spray paint it anyway!  What color did I choose???
TURQUOISE!
 I used my trusty cardboard box that I've been using lately to spray paint things on the front lawn, and it worked wonderfully for this little trick.  I held it up next to the edge of the door so that it wouldn't overspray on anything else, and it was great!  (I only have a little part to touch up on the trim behind the door.)
 The whole door only took 1 can...I was surprised!  I actually bought the can of spray paint for something else...guess I'll have to go get another one! ;o) 
 When I took off the tape I LOVED IT!!!
This is what my front door looked like Monday mid-morning!
Now I want to paint the door knob silver and add a cute saying in vinyl.
What color is your front door?

Lots o' love,

Megan

Friday, June 10, 2011

I'VE BEEN FEATURED!!!!!!!! and UGLY Stool Re-do

So I was checking my email and Cindy over at Cinsarah said that she featured me on her Favorites Friday post! I checked out her blog and yep...I'VE BEEN FEATURED!!!!  This is so exciting!  THANKS CINDY, for making me feel like a rockstar!  You guys should check out her blog.  It's pretty sweet!

Okay, so here's another project I worked just finished.

Last Wednesday I went thrifting with my new creative friend Amy.  We had such a blast!  Here's what I got for $12!  I love half-price day!
 UGLY stool, (and actually Amy got it first, but it was covered with a pillow that someone tacked on.  When I was taking it in to her apartment for her I told her that it felt like it was a weird shape.  She cut the pillow off and EEEWWWWWW!!! It's got to be the UGLIEST stool I've EVER seen!  We laughed so hard! She didn't want it AT ALL so I gave her the $2 is cost her, and I took it home!)

I also purchased: a wire basket, to hold fruit
2 silver candle holders
1 beautiful pewter single stem vase that I'm not going to alter.  It's perfect as is!
 1 bubble glass serving plate 
1 ugly duckling...more to come on that one.

So the first thing I HAD to do was tackle that stool!
Originally, I wanted to replace the step and paint it all white, but the Hubs suggested staining the top like our floors...I thought about the kids using this stool and how if it was white, it'd get pretty nasty fairly quickly.  Stain it is!  GREAT IDEA!!! THANKS HONEY!!!
I grabbed a hammer and knocked the heart off...(shot to the heart, and you're to blame darling, you give love a bad name)
So much better already!
A little piece that can be fixed easily...
 Put wood glue on the little chip and put it back in place.
 It wouldn't go all the way down, 
 So I grabbed my hammer again and gave it a whack.
 I clamped it in place and let it dry.
 The top may have been flush, but now the bottom wasn't.
 I sanded a little to make it smooth again.
Primed the base.
 Gave it 2 coats of Rust-o-leum Ivory Bisque and the base was finished. 
Now for the step.  I sanded the edges of a scrap piece of oak we had leftover from our floors.
 It happened to fit perfectly!
 I used the same stain as our floors.
 
 Here is the 1st coat.
 This is the 2nd.
 And here is the 3rd...nice and dark!
 Time to attach the step to the base.
 I lined it up evenly
 on both sides.
 I made little pencil marks where the base was on both sides.
 Laid down a little wood glue.
 Lined it back up and nailed it in place. I applied the 1 layer of poly.
 I took it outside to dry. Here is the second coat of poly.
 And here is the 3rd coat.  Isn't it beautiful!
I love how the grain glistens!

That's my kind of makeover!

Lots o' love,

Megan